· g4lile0 · tutorial · 3 min read
How to Add a New Satellite to the tinyGS Network
A complete step-by-step guide for satellite operators and missions to integrate and test their spacecraft on the tinyGS network.
Are you a satellite operator, university team, or radio amateur launching a new mission? The tinyGS network allows you to leverage thousands of ground stations around the globe to capture your satellite downlinks in real time.
To officially list a new satellite in our public index, we require information about your spacecraft, a validated modem configuration, and a custom telemetry decoder. Here is the complete step-by-step integration guide.
1. Required Satellite Metadata
Before technical integration, we need the basic identity of your mission to build your satellite’s dedicated dashboard. You can explore how other missions look on the tinyGS Satellites Page.
Please gather the following:
- Satellite Name: The official name or designation of the spacecraft.
- Photos: High-resolution pictures or renderings of the satellite.
- Descriptions: A short summary (one sentence) and a long comprehensive description detailing the mission goals and team.
2. Validating Your Radio Configuration (Local Testing)
The absolute best way to ensure our global network can listen to your satellite is to manually configure your own tinyGS ground station to test it locally.
⚠️ Critical Safety Rule: When performing these local tests, you must put your station into Test Mode and use your temporary satellite name. Never use the name of a currently active satellite, and keep your transmission duty cycles within one minute to avoid spamming the backend.
Follow these steps on your ground station control panel:
Step 1: Switch to Test Mode
Log into the tinyGS console. Go to your station page, click on Edit Station, change the station status to Test Mode, and click SAVE. 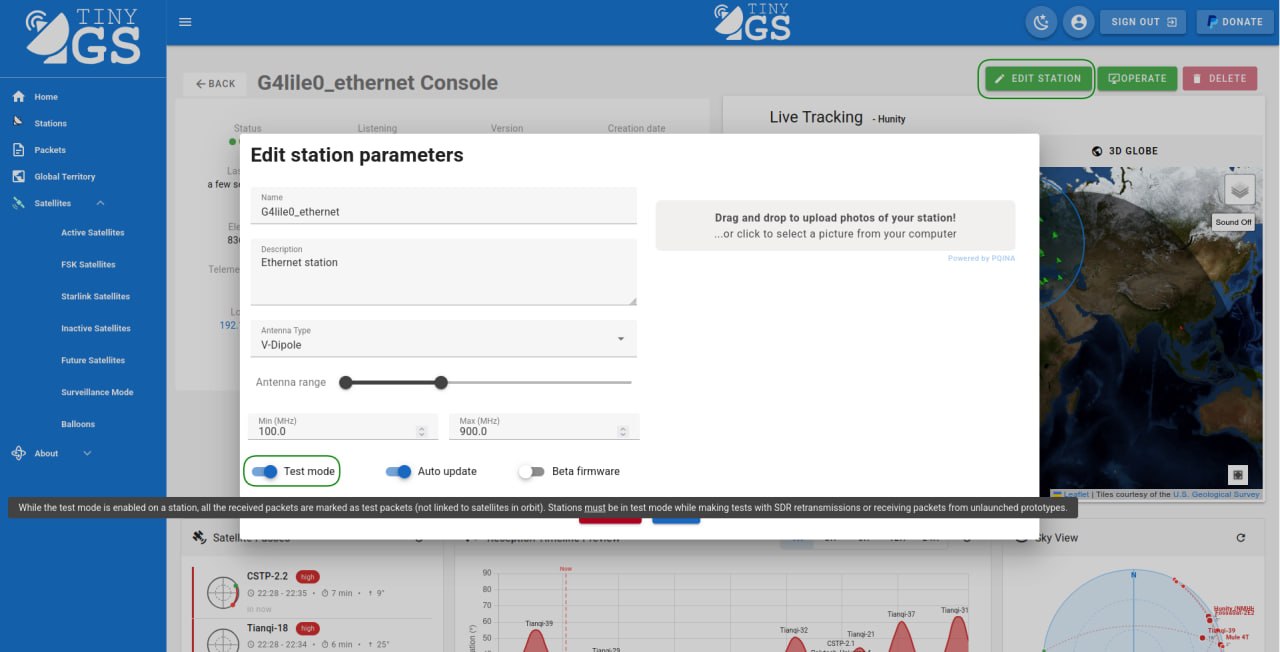
Step 2: Open the Operations Console
Once saved, click on the Operate button located at the top right of your station dashboard screen. 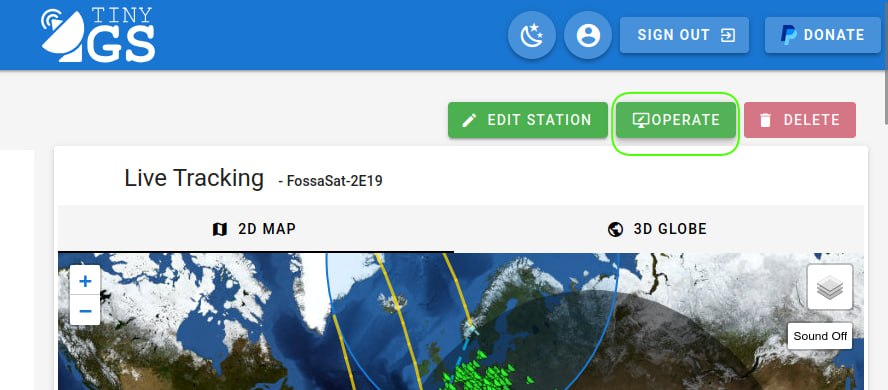
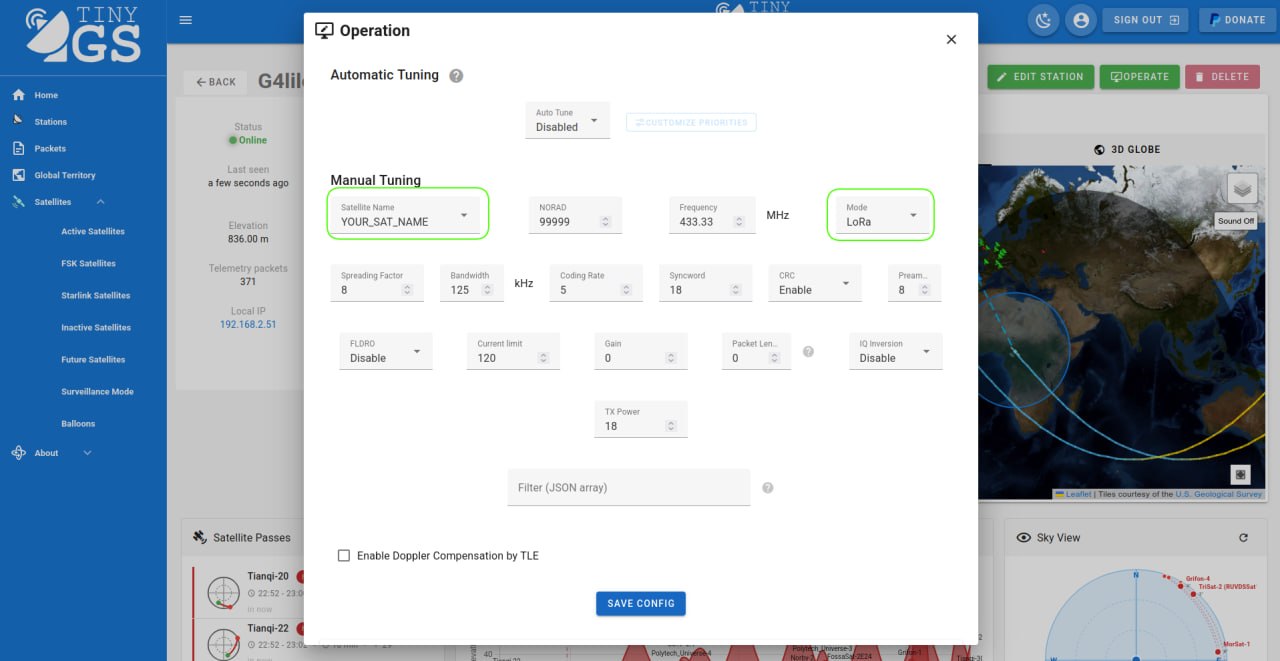
Step 3: Disable Automatic Tuning
Under the Automatic Tuning section, open the dropdown menu list and select Disabled. This prevents the tinyGS network from overwriting your custom testing parameters. 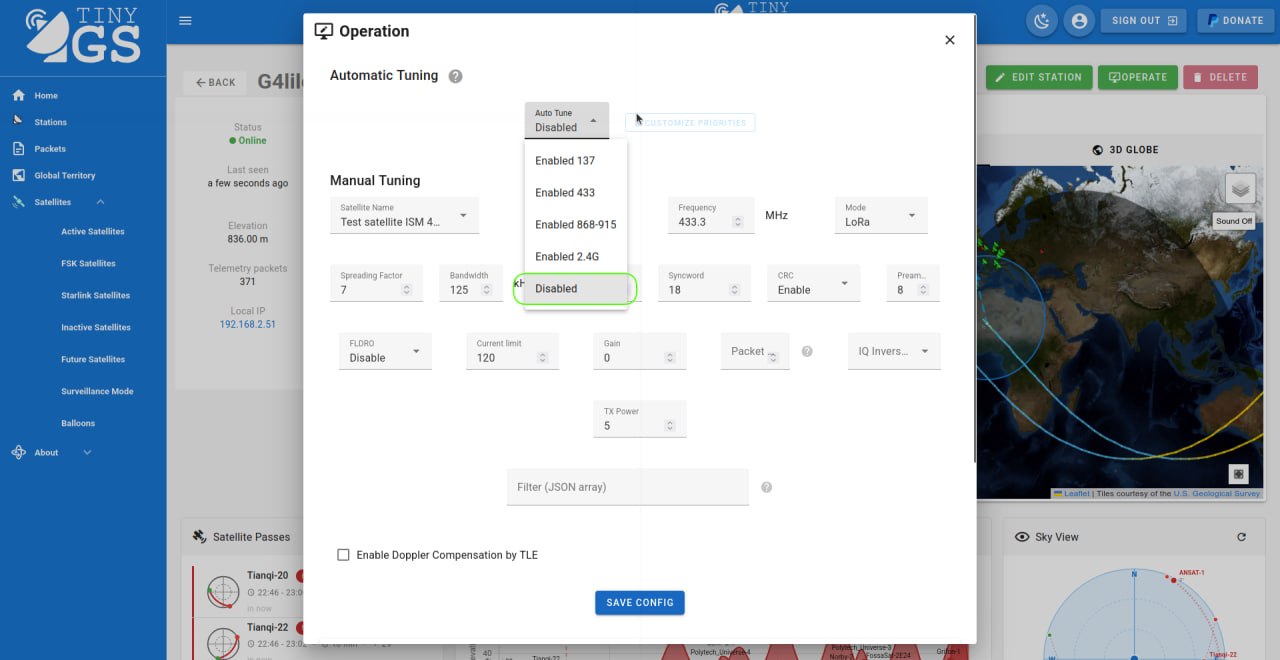
Step 4: Apply Manual Parameters
Under Manual Tuning, type your custom satellite name, select the modulation type (LoRa or FSK), and carefully input your specific radio configuration parameters (Frequency, BW, SF, CR, CRC).
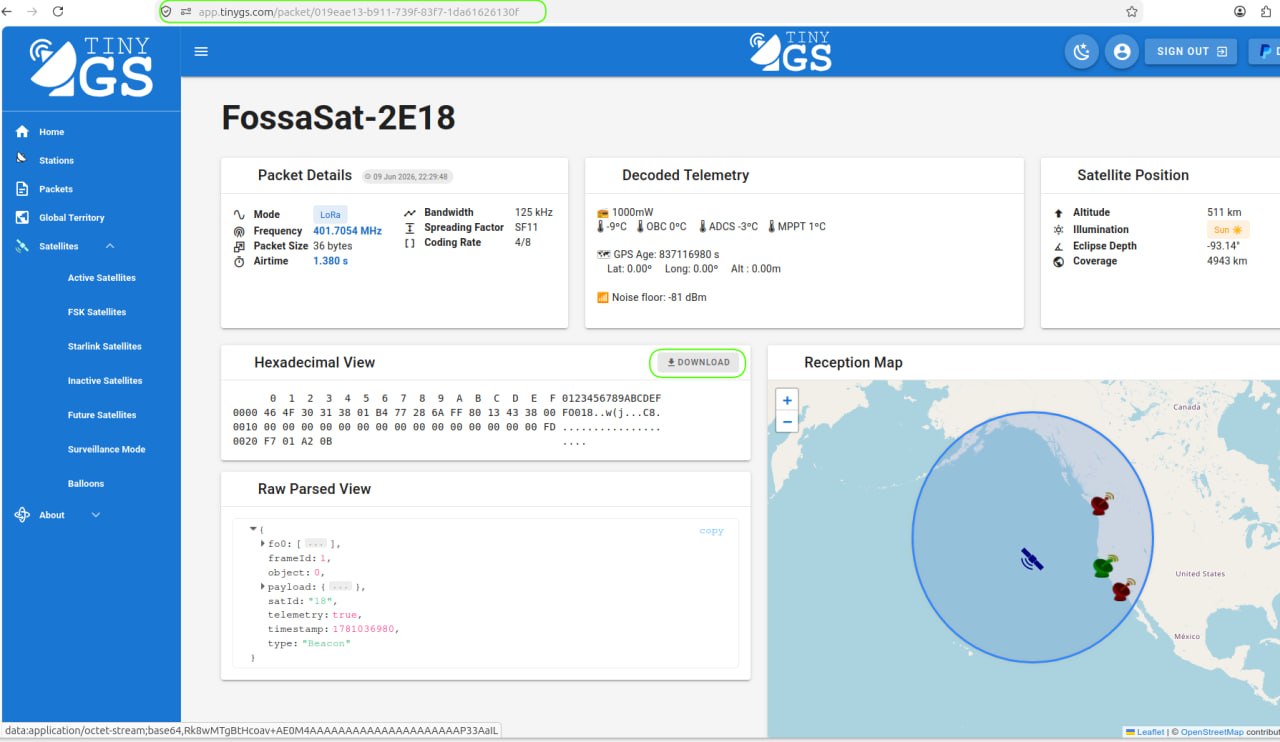
Once you verify a successful local reception, please save the link to your test reception frame—we will need it to verify your configuration!
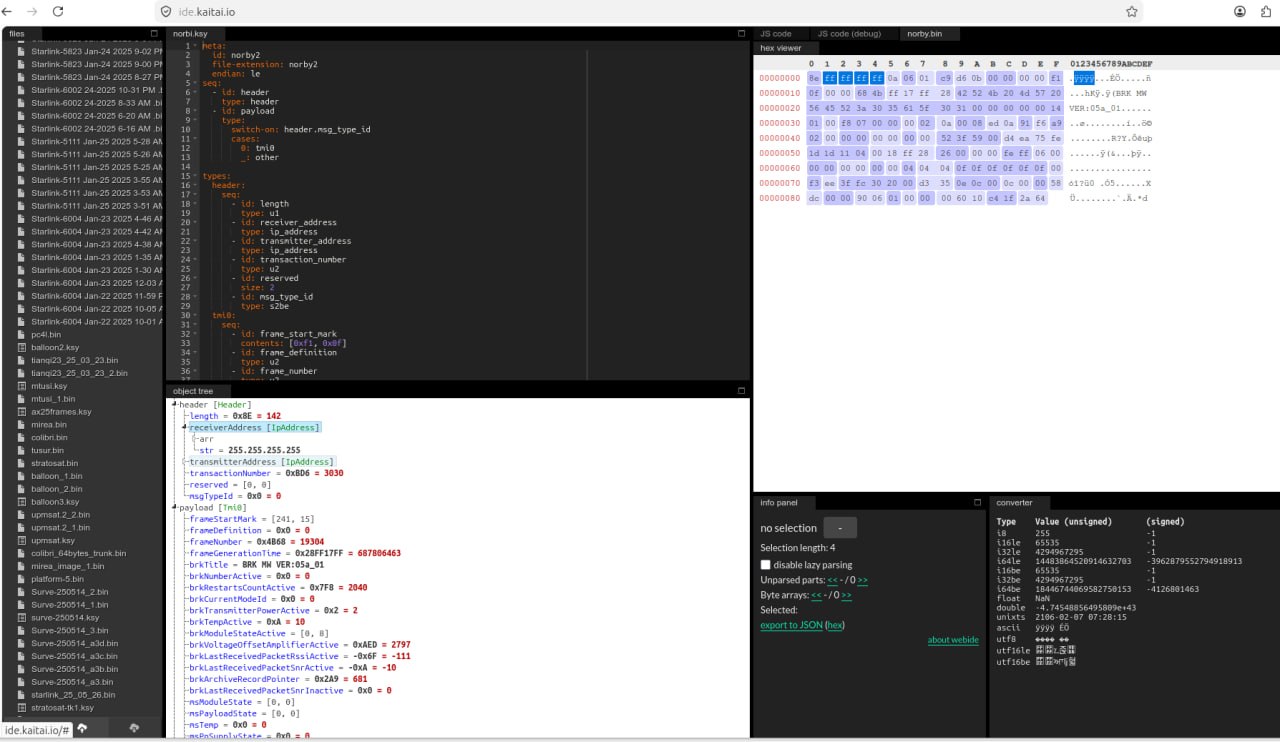
3. Creating a Kaitai Telemetry Decoder
In order for the tinyGS web dashboard and Telegram channels to decode your raw frames into human-readable telemetry data, we require a Kaitai Struct (.ksy) decoder valid for your payload formats.
Kaitai Struct is a declarative language used to describe binary data structures. You can check an excellent working example by looking at how the Norbi satellite decodes its downlinks: 👉 View the Norbi Satellite Kaitai Decoder Sample
When properly configured, your decoded data fields will map beautifully to the live telemetry charts on the network dashboard.
4. Real-Time Data Forwarding (Webhooks)
Once your satellite is officially integrated and tinyGS starts receiving your telemetry frames globally, we can forward them to your mission control servers in real time.
- Webhook Endpoints: We can issue a
POSTrequest containing the raw or decoded frames straight to your secure API server in real time as packets land. - Security & Compliance: Please consider that tinyGS only forwards packets with publicly known payloads according to the global tinyGS Manifest.
Ready to Submit? 🚀
Once you have gathered your metadata, verified your parameters via a test reception link, and prepared your .ksy file, send everything over to our mission integration team at:
We will review the parameters, run a final validation, and launch your new satellite dashboard live on the global network!